 Tweet
Tweet
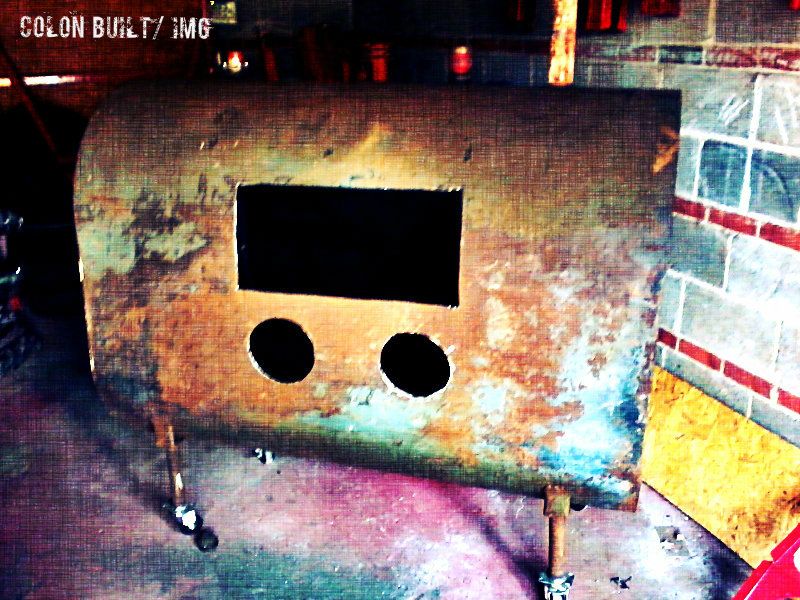
Over the past few week I have been searching for an oil tank on a mission day to day. I went to Planville and failed because the oil tank was stuck in the basement and the only way to get it out was to cut it. A few days ago I put an ad on craiglist looking for a oil tank being thrown away. My prayers were answered when a Vietnam Vet gave me a call locally and today I hauled this oil tank that will new my bitch for the remainder of its time. I want it to look flashly but its soul purpose will be for sandblasting. This bitch weighs at over 200lbs and if it tips over you better not be in its way.
CTVTEC SAY HELLO TO THE NEWEST MEMBER
SUZY

OVER THE NEXT FEW WEEKS SHE IS GOING TO BE TRANSFORMED FROM JUNK OIL TANK TO MILF SUZY
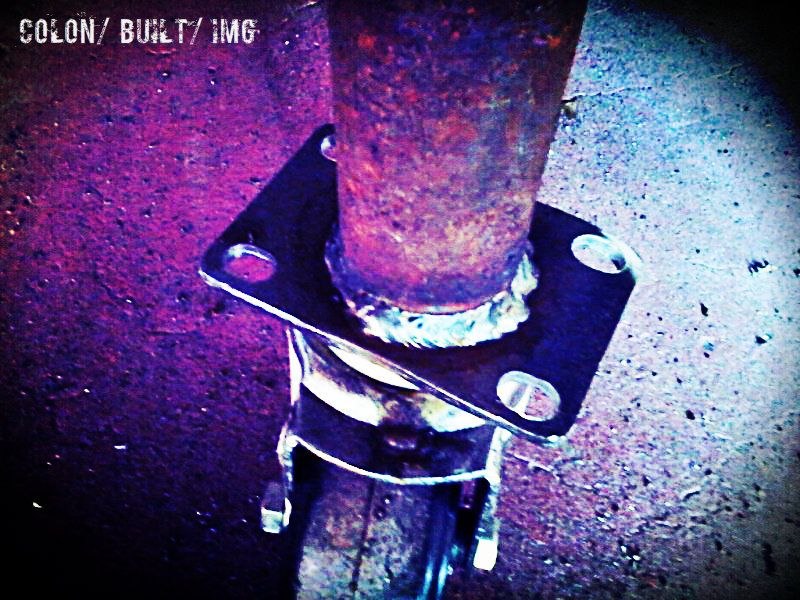
UPDATE 11/2/2012
SHE IS GETTING THERE!
Slow and steady wins the race
welds on the wheels
NEXT IS CLEANING ALL THE JUNK OUT THE INSIDE AND MAKING MY DOOR BIG ENOUGH FOR A BIKE FRAME IF ANYTHING
11/5/2012
Today I cleaned out all the junk from the inside w/o polluting the environment. So I did get down and dirty with my pops. SHOUT OUT TO MY DAD, because we do all of my projects together. I don't know what I would do w/o him.
There was still a lot of oil inside but it was taken out by tipping the tank over on a side that was plugged. Anything not taken out was taken out with a cup.
Then after that it was degreased and power-washed.
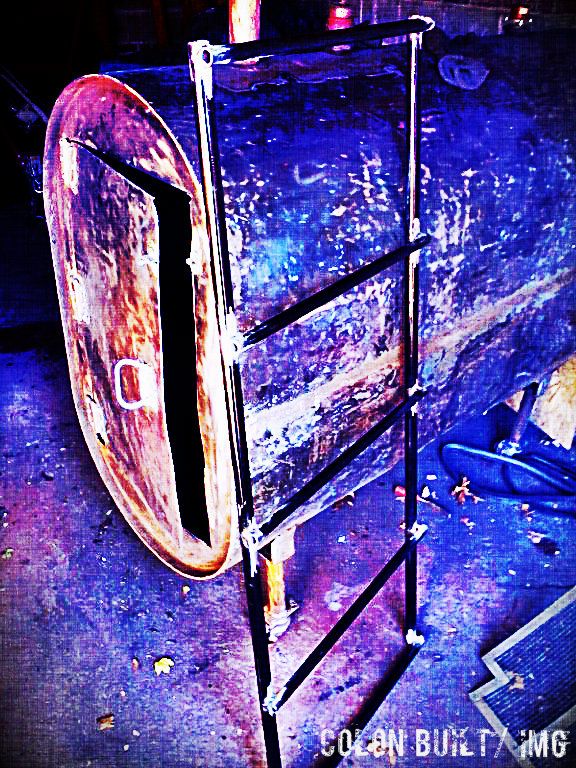
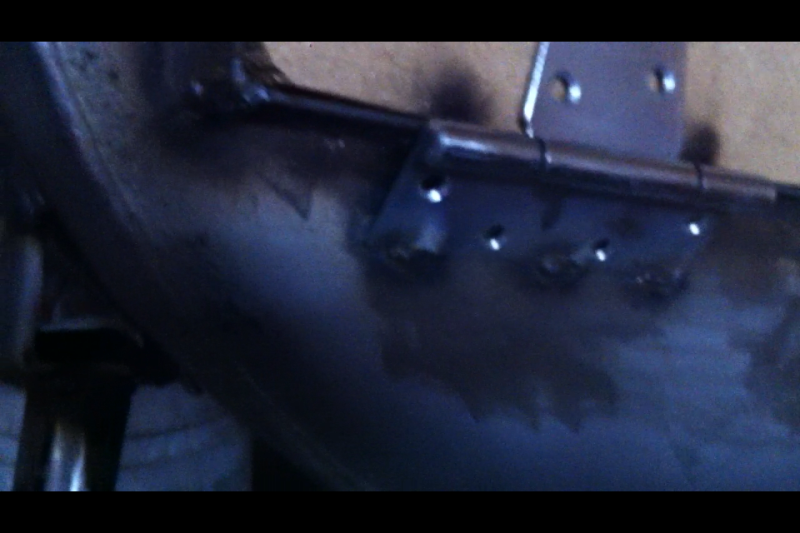
Here is a shot of the tank with the door hing welded on and door handle.

HERE IS A SHOT OF THE HINGE TACKED ON

If you look closely you can see that the door is not perfectly straight. I did it with the reciprocating saw. I did use up a few blades but the crazy vibration while cutting caused the cut to not go straight. If you plan on doing some project like this, be cautious and when you cut this thing is loud. Torch cutting is best for this but it has to be cleaned first for safety reasons.
NEXT IS GETTING THE DOOR TO SHUT AND SEAL EVERYTHING. PUT IN LIGHTS, MAKING A STAND FOR THE INSIDE AND PAINTING THIS BIATCH! ALMOST DONE
11/8/2012
A little mock up

fiberglass disk, what up doe?

11/10/2012
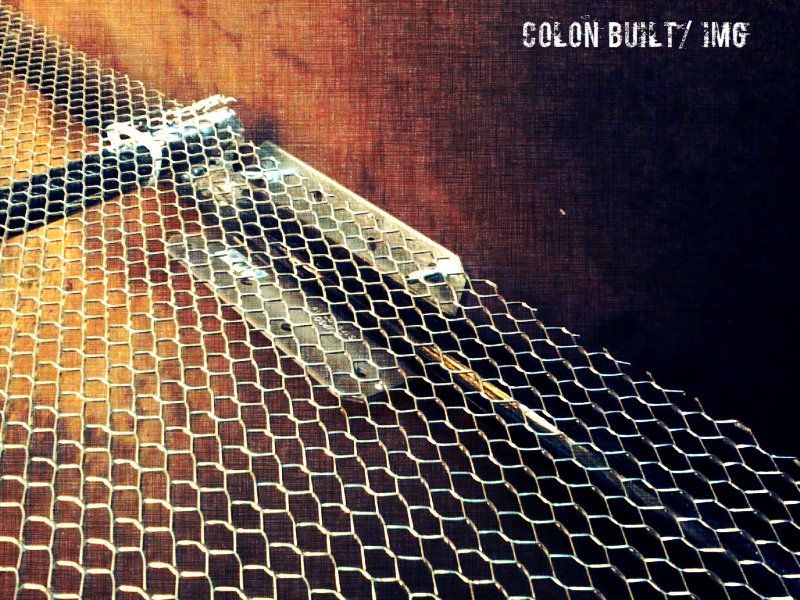
I welded up some tubing and this will be my table for the inside on the cabinet. I have L brackets that will be put in place inside. Tubing costed me about $20. I got a 3/4 x10' cut into (2) 5'. Then 1/2''x10' cut into (5) 2'. So its basically a 5'x2' all welded. I'm going to try to pick up some steel lath from home depot to weld on top of that.

Half way cleaned for paint
11/12/2012
basically how she looks still
Got the rack inside, the steel lath coat me $8 at home depot. they sell it as 8''x24''. It was zipped tied to hold. The rack inside fits snug and does not move.
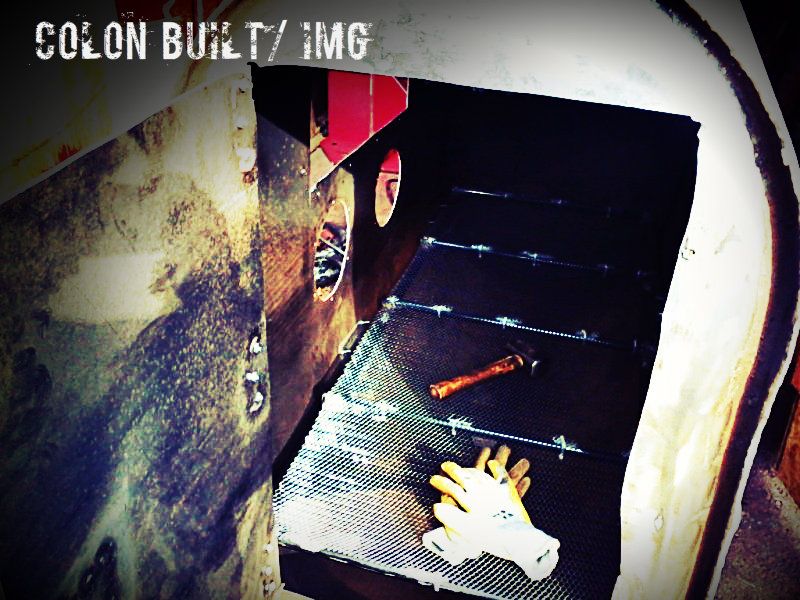
shot of the brackets and lath zip tied
11/14/2012
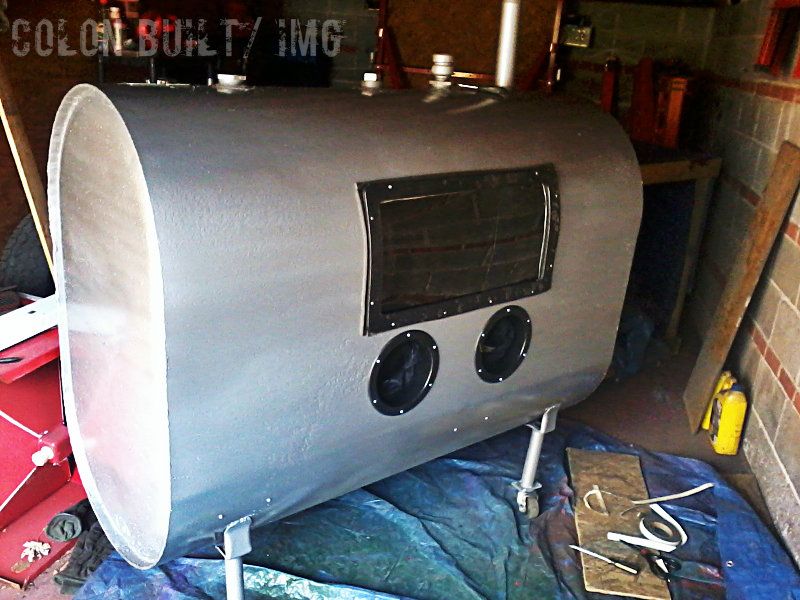
painting hammered silver, can't wait to finish and get my garage back

11/15/2012
FINALE!!!!

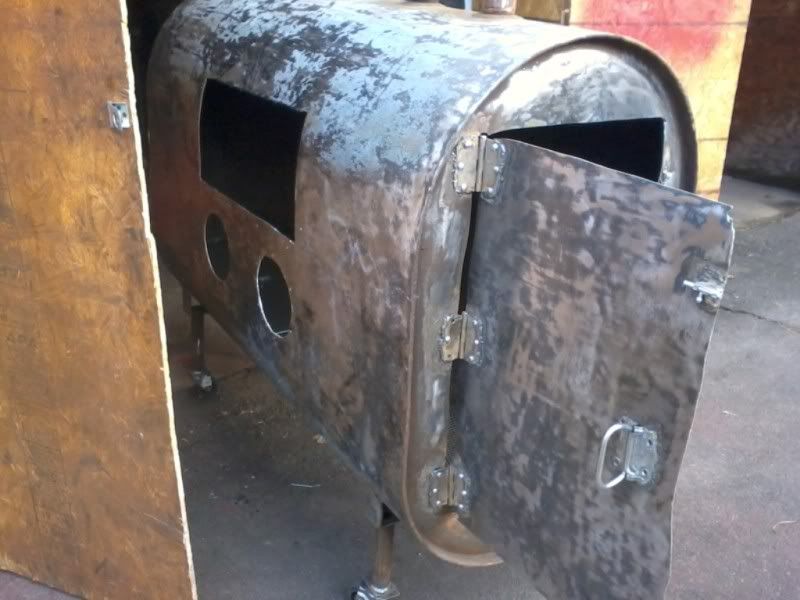
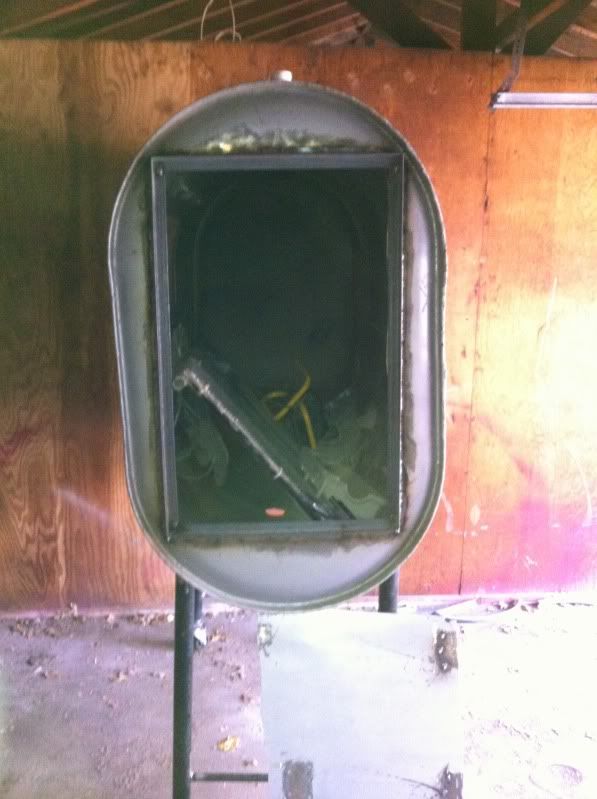
JUNK YARD DOOR SEALS
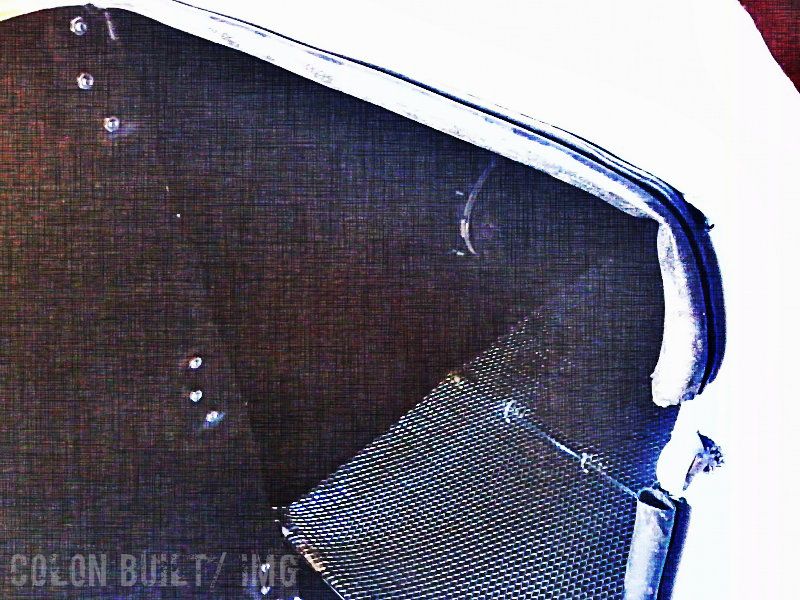
PLEXIGLASS WAS USED AND WEATHERSTRIPPING TO SEAL AROUND. GLOVES WERE FROM AN OLD CABINET I HAD.
2/22/2013
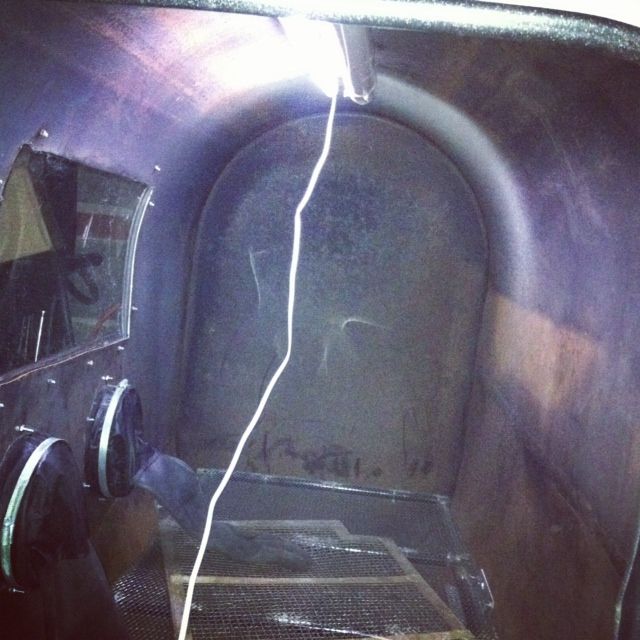
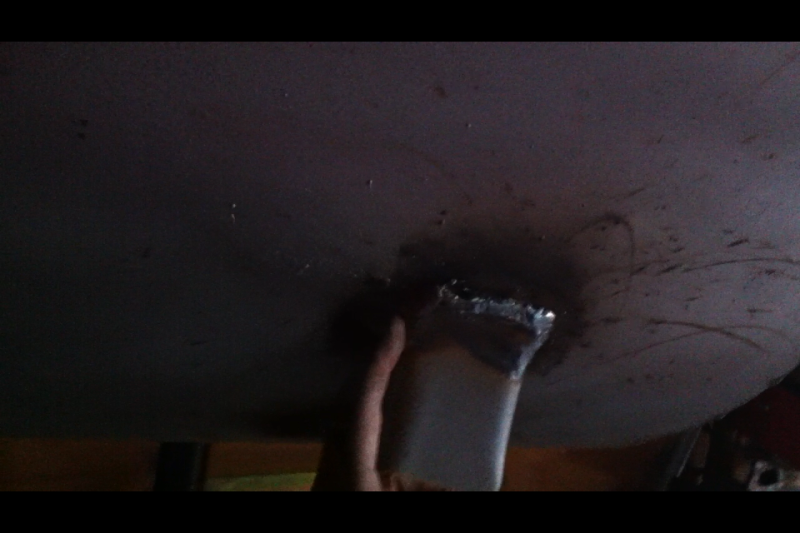
testing out the light for the cabinet
11/10/2013
Everyone has seen this old cabinet i made, now im in the process of modifying it again
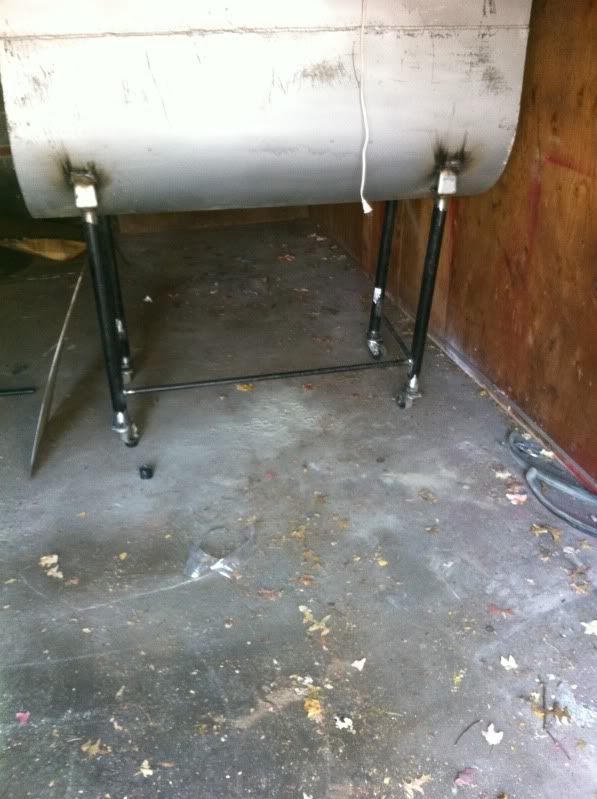
here you see i added more support and taller legs
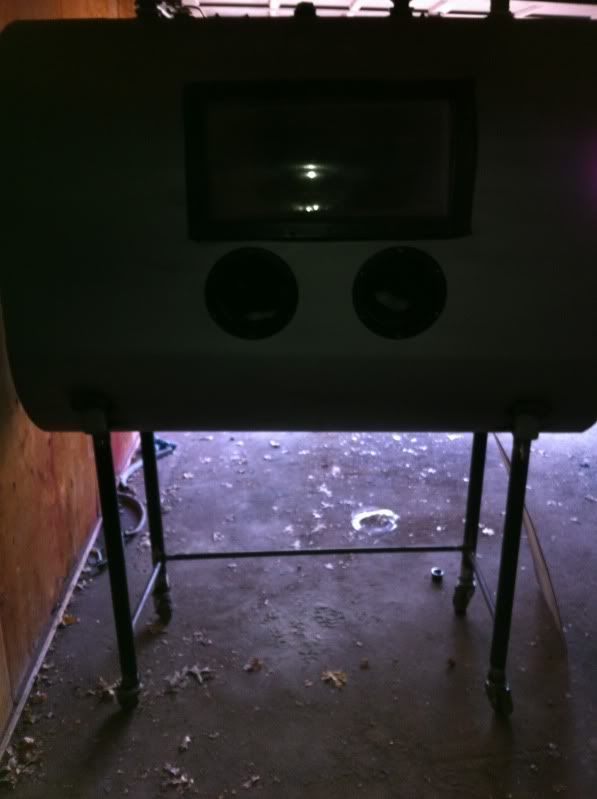
I also changed up the door and welded angle iron all the way around.
how she looks from the front, im 5'9 so this is prefect height now
im going to try out some left over particle board and see how she seals with the weather stripping

welded hinges
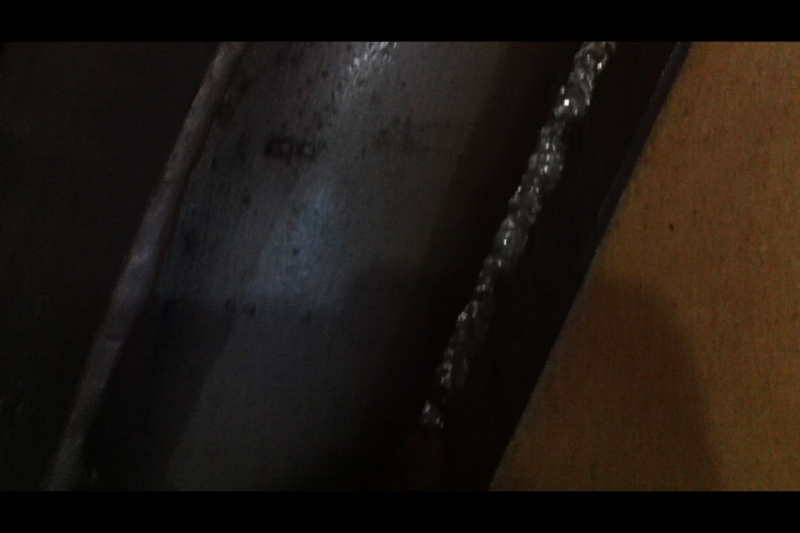
stress points i did more welding
shot of the welding around the door
link to youtube video of this project
CTVTEC SAY HELLO TO THE NEWEST MEMBER
SUZY
OVER THE NEXT FEW WEEKS SHE IS GOING TO BE TRANSFORMED FROM JUNK OIL TANK TO MILF SUZY
UPDATE 11/2/2012
SHE IS GETTING THERE!
Slow and steady wins the race
welds on the wheels
NEXT IS CLEANING ALL THE JUNK OUT THE INSIDE AND MAKING MY DOOR BIG ENOUGH FOR A BIKE FRAME IF ANYTHING
11/5/2012
Today I cleaned out all the junk from the inside w/o polluting the environment. So I did get down and dirty with my pops. SHOUT OUT TO MY DAD, because we do all of my projects together. I don't know what I would do w/o him.
There was still a lot of oil inside but it was taken out by tipping the tank over on a side that was plugged. Anything not taken out was taken out with a cup.
Then after that it was degreased and power-washed.
Here is a shot of the tank with the door hing welded on and door handle.
HERE IS A SHOT OF THE HINGE TACKED ON
If you look closely you can see that the door is not perfectly straight. I did it with the reciprocating saw. I did use up a few blades but the crazy vibration while cutting caused the cut to not go straight. If you plan on doing some project like this, be cautious and when you cut this thing is loud. Torch cutting is best for this but it has to be cleaned first for safety reasons.
NEXT IS GETTING THE DOOR TO SHUT AND SEAL EVERYTHING. PUT IN LIGHTS, MAKING A STAND FOR THE INSIDE AND PAINTING THIS BIATCH! ALMOST DONE
11/8/2012
A little mock up
fiberglass disk, what up doe?
11/10/2012
I welded up some tubing and this will be my table for the inside on the cabinet. I have L brackets that will be put in place inside. Tubing costed me about $20. I got a 3/4 x10' cut into (2) 5'. Then 1/2''x10' cut into (5) 2'. So its basically a 5'x2' all welded. I'm going to try to pick up some steel lath from home depot to weld on top of that.
Half way cleaned for paint
11/12/2012
basically how she looks still
Got the rack inside, the steel lath coat me $8 at home depot. they sell it as 8''x24''. It was zipped tied to hold. The rack inside fits snug and does not move.
shot of the brackets and lath zip tied
11/14/2012
painting hammered silver, can't wait to finish and get my garage back
11/15/2012
FINALE!!!!
JUNK YARD DOOR SEALS
PLEXIGLASS WAS USED AND WEATHERSTRIPPING TO SEAL AROUND. GLOVES WERE FROM AN OLD CABINET I HAD.
2/22/2013
testing out the light for the cabinet
11/10/2013
Everyone has seen this old cabinet i made, now im in the process of modifying it again
here you see i added more support and taller legs

I also changed up the door and welded angle iron all the way around.

how she looks from the front, im 5'9 so this is prefect height now

im going to try out some left over particle board and see how she seals with the weather stripping

welded hinges

stress points i did more welding

shot of the welding around the door

link to youtube video of this project


 can't wait to see the finished look


Comment